Compiling LaTeX on Travis-CI
One of the best parts of the current software development environment is the proliferation of Continuous Integration (CI) services like Travis-CI. These CI services plug into GitHub or other code repositories to automatically run when new code is pushed to a repository. Typically CI is used for running automated testing every time new code is added so you can be reasonably confident a change hasn't broken any functionality. The premise of CI is the automation of tedious tasks like running tests.
When writing a LaTeX document, I find compilation the most tedious task. Particularly for large documents, where it can take a long time. This means I run the compilation irregularly, invariably resulting in a whole collection of errors that have accumulated and I now have to fix. Additionally the compilation of LaTeX documents is often highly machine dependent, only working properly with a specific configuration some reason. My final issue with LaTeX documents is ensuring all the files required for compilation are included in the git repository, not just hiding in a directory somewhere on your local filesystem.
As a way of preventing these issues in the write-up of my PhD thesis, I have developed a configuration for building LaTeX documents on Travis-CI. While I have come across other methods for compiling LaTeX documents on Travis-CI, they all compromise on the workflow I would like. I want a system that is;
- fast, with builds completing in a couple of minutes
- adaptable, not having to manually specify every package I use
- extensible, I can easily use pandoc to convert files to LaTeX before compilation
- uses
biber, the best practice for compiling the references
Choosing a LaTeX Distribution
There are a number of different methods to get a distribution of LaTeX installed. The main method
for Linux is the TeXLive distribution which is typically installed via the package manager. The
base TeXLive distribution is pre-installed on the Travis-CI image for A. However, this is only the
core extensions and so this approach is either fast in that the image just boots up, or
adaptable by downloading texlive-full which takes a long time.
The key issue with the TeXLive distribution is the lack of automatically downloading required
packages. A LaTeX distribution with this feature is MiKTeX, having an installer that is only 200
MB compared to the ~3 GB of the complete TeXLive. MiKTeX also provides a
docker container which is a great method for having exactly the same environment
compiling locally and through a CI service. Unfortunately MiKTeX doesn't install the biber binary
on Linux (or macOS).1 While it is possible to create a new container which includes the biber
binary, extending and maintaining a Docker container is non-trivial making this approach less
favourable. That said, for other Docker-centric CI services this could be an excellent approach.
Another newer and less well known LaTeX distribution is Tectonic. Although still considered beta
software, it works for most scenarios and has a lot of features that make it suitable for CI. I
would recommend installation with conda although there are a range of
installation methods for both Linux and macOS (currently no Windows support).
Like MiKTeX, Tectonic automatically downloads the packages required to compile a document, making
the same configuration adaptable to many different documents. Having conda as an installation method
is also particularly useful, allowing simple installation of many other tools (like pandoc) which
might be required to compile a more complex document. The only requirement not satisfied by Tectonic
is the automatic installation of biber. Although not supported natively, it is possible to use
biber with tectonic as long as the appropriate binary for biber 2.5 is installed,
either from Sourceforge or using conda
conda install -c malramsay biber==2.5
Compiling Documents with Tectonic
Typically, compiling documents with tectonic requires a single command
tectonic document.tex
creating the file document.pdf and automatically removing all intermediate files normally
associated with compiling LaTeX documents. To use biber instead of biblatex for the bibliography
the process is not quite so simple. In an attempt to make it easier I have created the Makefile
below which can be used to create a document.
# Makefile

# directory to put build files
build_dir := output

.PHONY: all

all: document.pdf

%.pdf: %.tex | $(build_dir)
	tectonic -o $(build_dir) --keep-intermediates -r0 $<
	# Run biber if we find a .bcf file in the output
	if [ -f $(build_dir)/$(notdir $(<:.tex=.bcf)) ]; then \
		biber --input-directory $(build_dir) $(notdir $(<:.tex=)); \
	fi
	tectonic -o $(build_dir) --keep-intermediates $<
	cp $(build_dir)/$(notdir $@) .

$(build_dir):
	mkdir -p $@
This build process runs tectonic once with the --keep-intermediates option to generate the
intermediate files. I then check for the presence of a .bcf file, which is the file biber uses
to to it's thing. Tectonic is then run afterwards, which runs the compilation step as many times as
it needs to finalise the output. The final step is copying the output PDF from the build directory
to the local working directory.
If you want to continue using your standard LaTeX build tool locally (in my case this is latexmk),
you can check whether the TRAVIS environment variable is defined enabling separate build
processes as in the example compilation step below.
%.pdf: %.tex | $(build_dir)
ifdef TRAVIS
	tectonic -o $(build_dir) --keep-intermediates -r0 $<
	# Run biber if we find a .bcf file in the output
	if [ -f $(build_dir)/$(notdir $(<:.tex=.bcf)) ]; then \
		biber --input-directory $(build_dir) $(notdir $(<:.tex=)); \
	fi
	tectonic -o $(build_dir) --keep-intermediates $<
else
	latexmk -outdir=$(build_dir) -pdf -xelatex $<
endif
	cp $(build_dir)/$(notdir $@) .
The TRAVIS environment variable is defined on all Travis instances and can be set locally for
testing using the command
TRAVIS=true make
This sets the variable TRAVIS just for the single command. Note that you will want to run a
make clean between running with the different build systems as there will be incompatibility
between versions.
Configuring Travis CI
With a LaTeX distribution that is suitable for CI in Tectonic, how do I actually use Travis CI?
This is a complicated process, which took me 81 attempts to get right. I hope this guide helps you in making significantly fewer than me. The outline of the steps is below. The first three are configuring and linking your accounts on GitHub and Travis. The rest of the steps are explained in more detail in the rest of this document.
- Create a public repository on GitHub. Travis CI only works with GitHub and while it does work with private repositories they requires a paid account with Travis.
- Using your GitHub account, sign in to GitHub and add the Travis CI app to the repository you want to activate. You'll need Admin permissions for that repository.
- Once signed in to Travis CI, go to your profile page and enable the repository you want to build.
- Create a
.travis.ymlfile in the repository which tells Travis CI what to do. What you need to put in the file is addressed [below]({{<ref "#travis.yml" >}}). - Commit the
.travis.ymlfile to the repository and push to GitHub. Travis will see the commit and start the build process. - Any further commits to the repository, whether to the master branch, other branches, tags, or pull-requests will trigger a build on Travis.
Creating a .travis.ml file
The .travis.yml file is comprised of a number of sections which I have described individually
below. The complete file is available for download. To get Travis to start building
your repository, commit the .travis.yml file to the repository and push the commit to GitHub.
The first part of the .travis.yml file is specifying the language, which is
choosing which of the base containers to use for the compilation.2 Since we are using conda for
installing any dependencies we can use the minimal image.
language: minimal
The next part is the cache, where I added the $HOME/.cache/Tectonic directory. This is where
tectonic stores the downloaded tex packages. Rather than downloading all the packages required on
every build, the state of this entire directory will be downloaded at the start of the build and
updated when changed at the end of the build. This significantly speeds up the build process.
cache:
  directories:
    - $HOME/.cache/Tectonic
An additional directory that can be cached is $HOME/miniconda so the conda packages are also
pre-installed on every build. This is less of a speed-up, although it can be helpful.
The next step is specifying the steps to occur before_install. Travis has a number of steps in the
lifecycle of a build providing ways of breaking the build into logical
steps. Each item in the list below is a bash command, which is run to update the environment of the
test container. This downloads and installs both biber and conda, with conda then being used to
install tectonic. Any other dependencies that are required can also be added to this step, say if
you are converting Markdown to LaTeX with pandoc you could add conda install pandoc.
before_install:
  # Download and install conda
  - wget https://repo.continuum.io/miniconda/Miniconda3-latest-Linux-x86_64.sh -O $HOME/miniconda.sh
  - bash $HOME/miniconda.sh -b -u -p $HOME/miniconda
  - export PATH="$HOME/miniconda/bin:$PATH"
  - hash -r

    # Install tectonic
  - conda install -y -c conda-forge tectonic==0.1.8
  - conda install -y -c malramsay biber==2.5
The final step is the script, the code that is used to determine success or failure. Like the
before_install section, this is a list of commands which are executed one after another. Unlike the
before_install section all these commands are run, even when a command fails.
script:
  - make
The script section is also where you can add any other checks, like ensuring you haven't left in any TODOs, or spelling mistakes. You can run any code you like and if the exit code is zero it is deemed successful, while a non-zero exit code is a build failure. Note that a failing build will not go on to produce a release.
Deploying to GitHub Releases
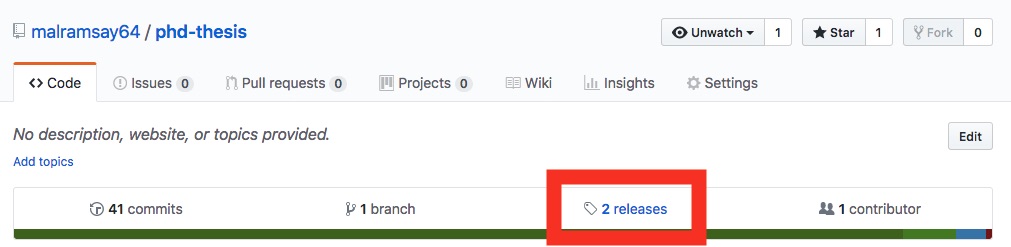
Having configured Travis to compile our document on every commit, it would be nice to actually do something with the resulting document. Every repository on GitHub has releases, which can be accessed by clicking on the releases link which is outlined in red on the image below.
GitHub automatically creates a release for every tagged commit in the repository, creating a
downloadable .zip and .tar.gz of the state of the repository at that commit. It is also possible
to edit each of the releases, adding release notes or additional files like installers for a
variety of platforms. In this case we are going to use the GitHub releases to store the compiled
document for each tagged release providing a historical view of the document which is linked to the
code generating it.
In writing of my PhD thesis it makes sense to tag releases using Semantic Versioning, or at least
a version of it. Other documents are much less linear, it might make sense to tag a
talk with the location it will be given, or the name of the conference. The requirements are
basically use numbers, letters and any of ._-+/ --- see the git-check-ref-format documentation for more
specific details).3
You can create a tag my_tag for a release by running the command
git tag -a my_tag
which will open an editor to write a message. A typical tag message is the repository name followed
by the tag, although that isn't the only approach. Like commit messages, you can specify
the message using the -m option.
By default, git doesn't push tags to a remote, requiring the
--tags option
git push --tags
Before pushing your newly created tag, you are going to want to configure Travis to upload releases to GitHub. The best method for this is to use the Travis command line client, which can be installed by following these instructions. Once installed you can run the command
travis setup releases
which will prompt for your GitHub credentials and other information about the release. These are
used to generate a personal access token for GitHub which Travis uses to authenticate when uploading
the release. The travis client will encrypt the token, and update your .travis.yml with a deploy
section which looks something like this;
deploy:
  provider: releases
  api_key:
    secure: # your encrypted token will be here
  file: thesis.pdf
  skip_cleanup: true
Since we only want to deploy on tagged commits, we can use the conditional deployment options to conditionally deploy. This gives the following deploy section.
deploy:
  provider: releases
  api_key:
    secure: # your encrypted token will be here
  file: thesis.pdf
  skip_cleanup: true
  on:
    tags: true
Conclusion
I have made the entire .travis.yml file available for download should you want to
get started quickly. Or alternatively have a look at my repositories usyd-beamer-theme or
phd-thesis which I have set up to use this workflow. This file along with the Makefile this
should enable this process to work for the compilation of most documents.
While the process is complicated to set up, once completed it shouldn't require much effort to maintain. There is the rationale it might save you some time, however I think it is cool which is all justification I needed.
Update 2018-07-26: Since initially writing this post I have created a conda package to
distribute the biber binary. I have updated the post and included files to use this package since it
significantly simplifies the installation. The steps from the original travis.yml file to manually
install biber are below.
  # Download and install biber installing executable as biber2.5
  - wget https://sourceforge.net/projects/biblatex-biber/files/biblatex-biber/2.5/binaries/Linux/biber-linux_x86_64.tar.gz -O $HOME/downloads/biber.tar.gz
  - tar xvzf $HOME/downloads/biber.tar.gz -C $HOME/bin
  - mv $HOME/bin/biber $HOME/bin/biber2.5
  - export PATH="$HOME/bin:$PATH"
I should note that MiKTeX will install biber on a Windows system. So if you wanted to set
up a Windows CI config I guess MiKTeX is a great approach.
There are more special characters supported, I just listed the most common ones. See the docs for more specific information.
You may notice that the minimal is not listed in the documentation. There is a GitHub issues to rectify this in which there is documentation.